Dashboard
Action
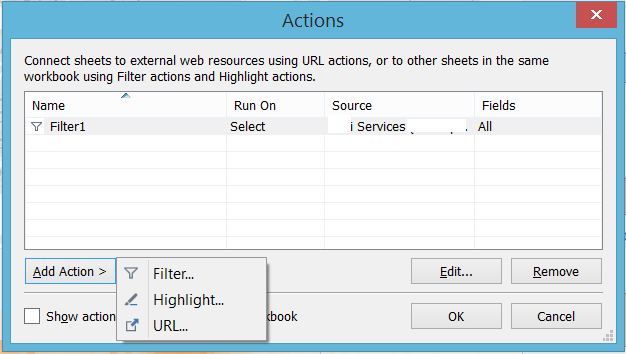
To have interactivity between charts within a dashboard, you will need to add an Action. Go to Dashboard > Action. There are 3 types of actions Filter, Url, and Highlight.
Action Filter

Create a Tooltip link to Change to Another Dashboard
This can be done using an action filter. Just select the “Target Sheet” as another dashboard, and change “Run Action On” to Menu. Label the action filter name properly since this name will be the one that appear in the tooltip.
Create a Back Button to Go to Previous Dashboard
- The concept is the same as the previous. But this time:
- Search for a custom shape that have a back button icon (.png).
- Add a field that will always be present in the data source (e.g., Number of Records) and add to rows/columns shelf.
- Remove the label and change the mark to shape.
- Use an Action Filter and select “Target Sheet” to the dashboard you want it to go back to.
Layout
Default
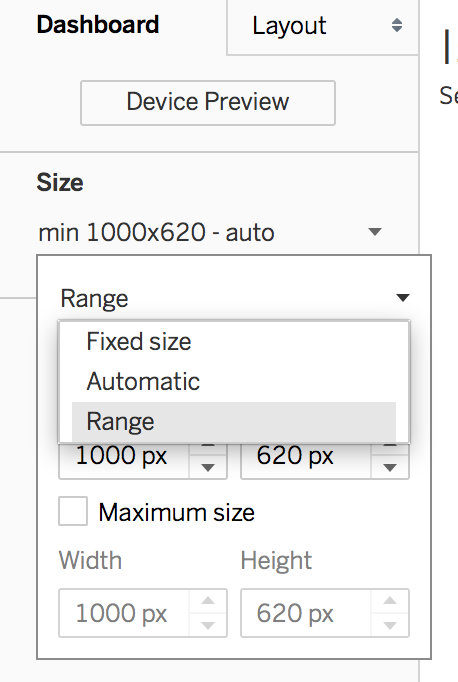
You can select a fixed, custom, or range of sizes for default.
Note that the Default dashboard is the parent while the device dashboards are children.
Therefore, any view, filter, action, legend or parameter that you want to add to a device layout must first exist in the Default dashboard. However, each device layout can contain independent web, image, text, and layout objects.
Device
If you remove an item from the device layout, it’s only removed from that layout. It still exists on the default dashboard and can be added back to the layout again, or to other device layouts.
You can only change the layout dimensions and sizing in preview modes. You are not allowed to edit the content, action filters, or other things.
More here.